To Send Out Your Emails You 1St Have To Create Your Own IP Address
NOTE: You can send up to 100 emails per day (3,000 emails, per month) through Income Activator's Partnership with SendGrid.
You can increase that limit to 100,000 per month with no daily limit for as little as $19.95 per month. Here's Sendgrid's Pricing Schedule.
When you sign up for SendGrid you are given your own unique IP Address represented as an API Key.
Often IP addresses can get Blacklisted, and if your does, you can cancel your SendGrid Account and create a new one, giving you a new IP Address that is not Blacklisted. Keep an eye on your Email Reputation.
SET UP
1. Go to
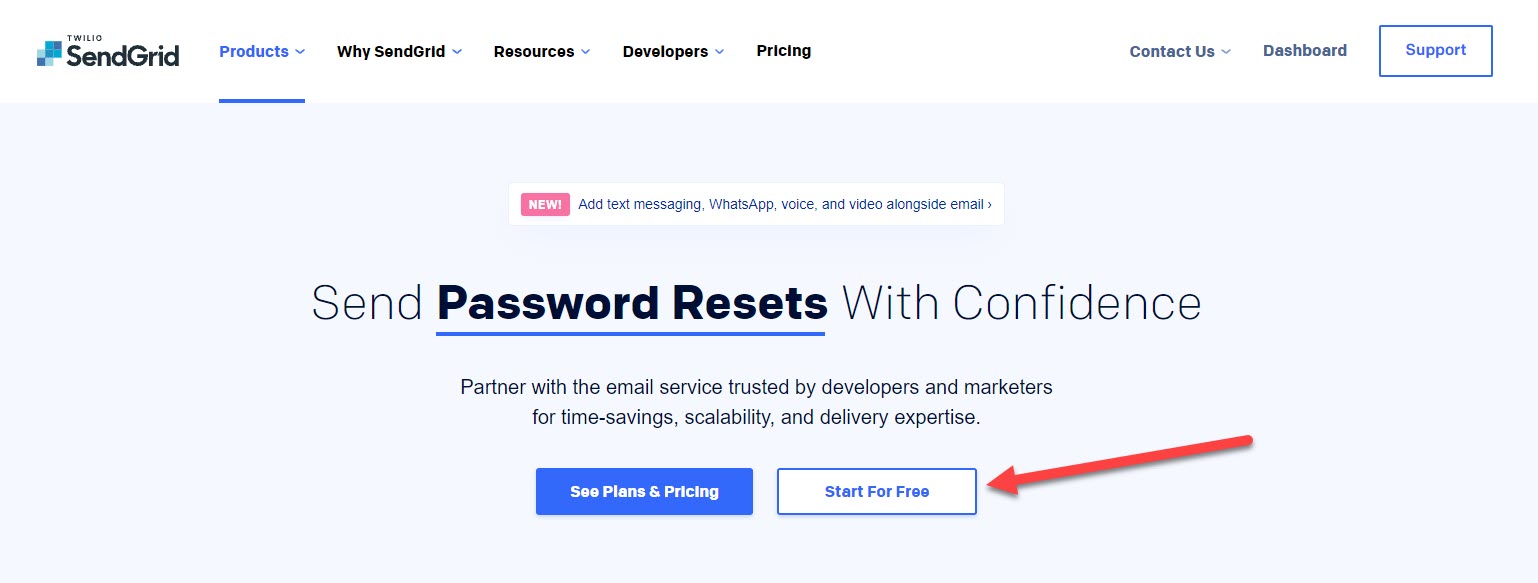
SendGrid.com and sign up for free.
- Click START FOR FREE
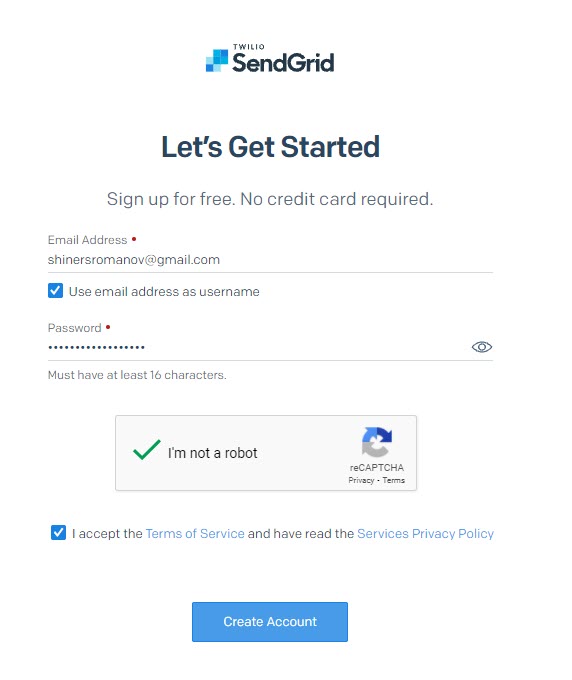
2. Enter in your Email Address & Create a Password
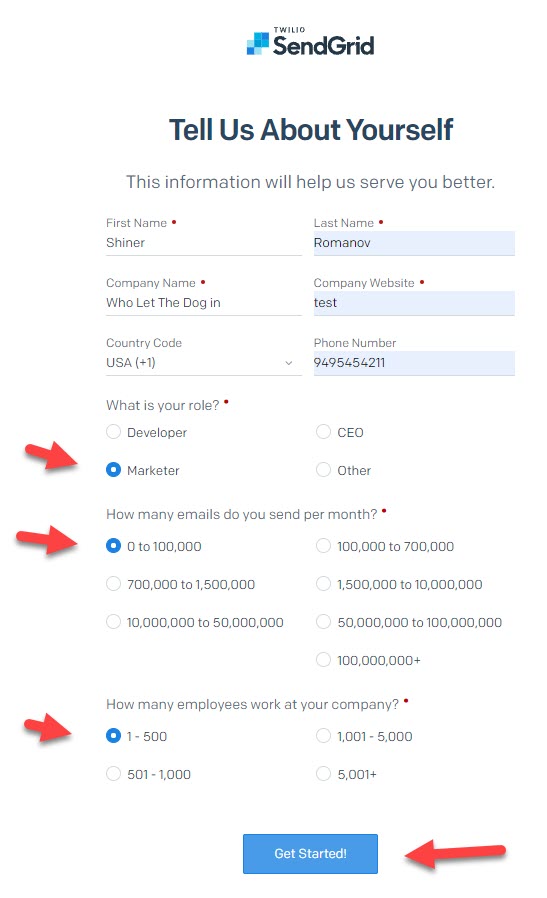
3. Complete the form - Marketer & API
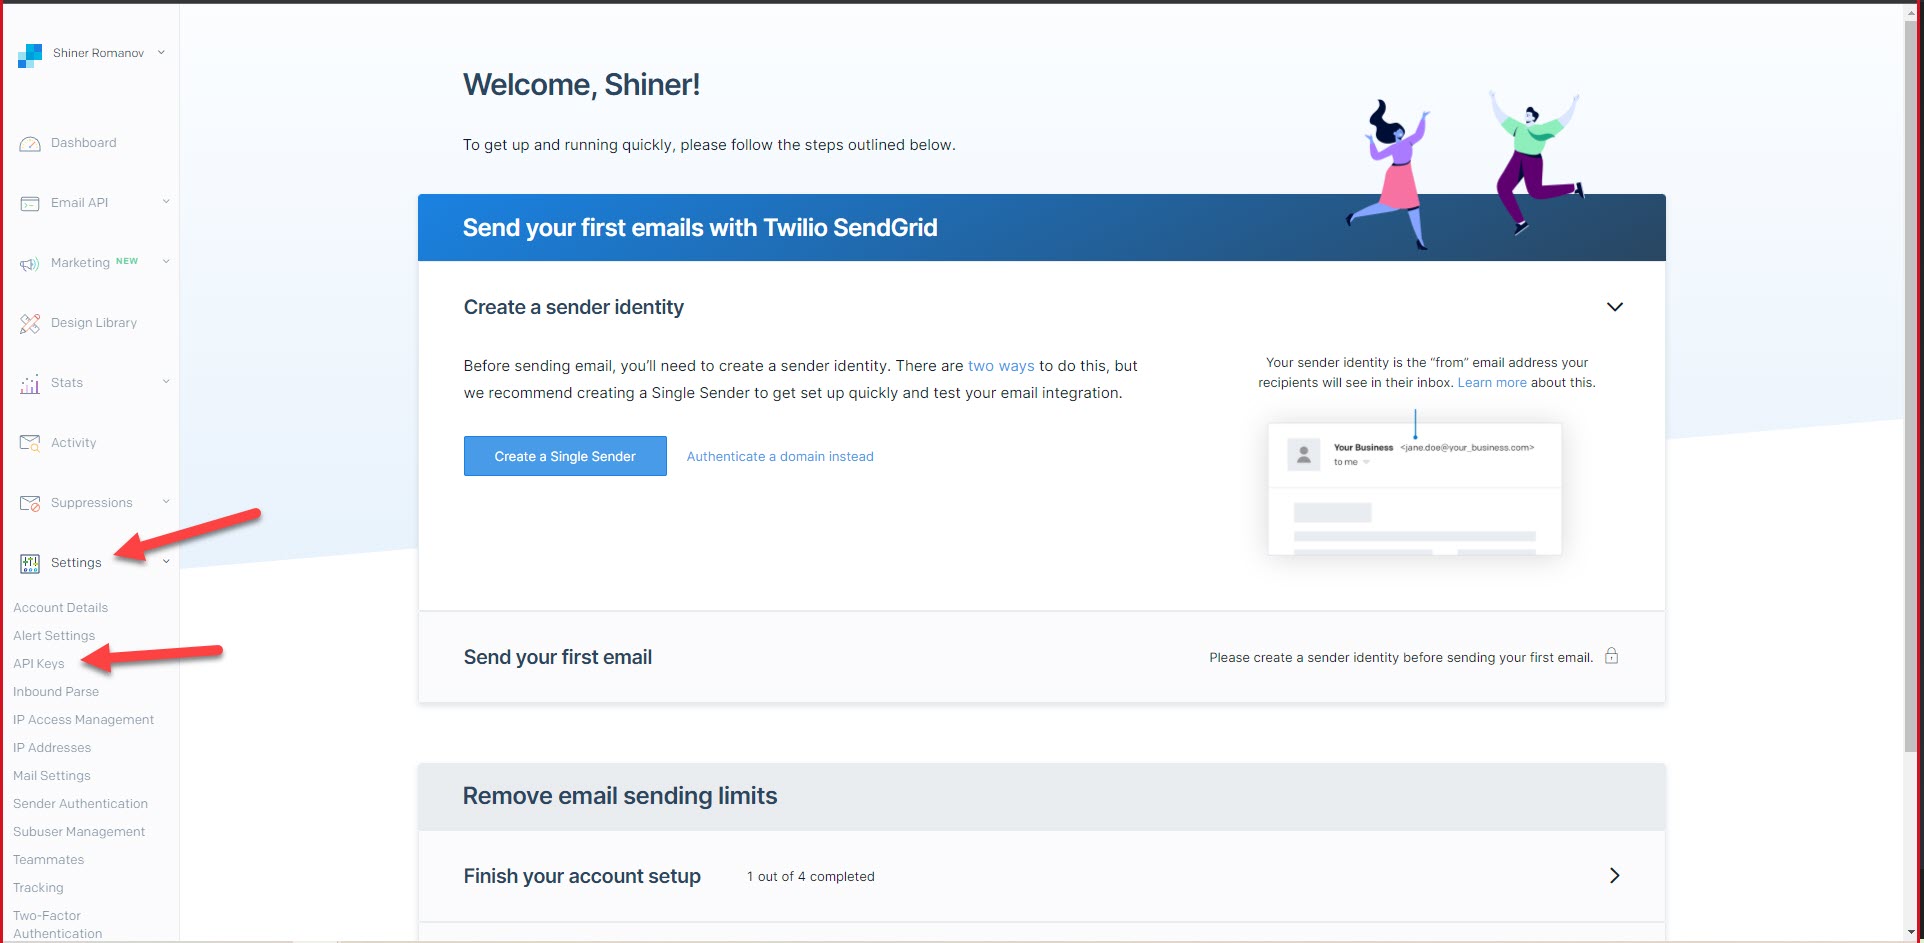
4. Click on SETTING, then API Key
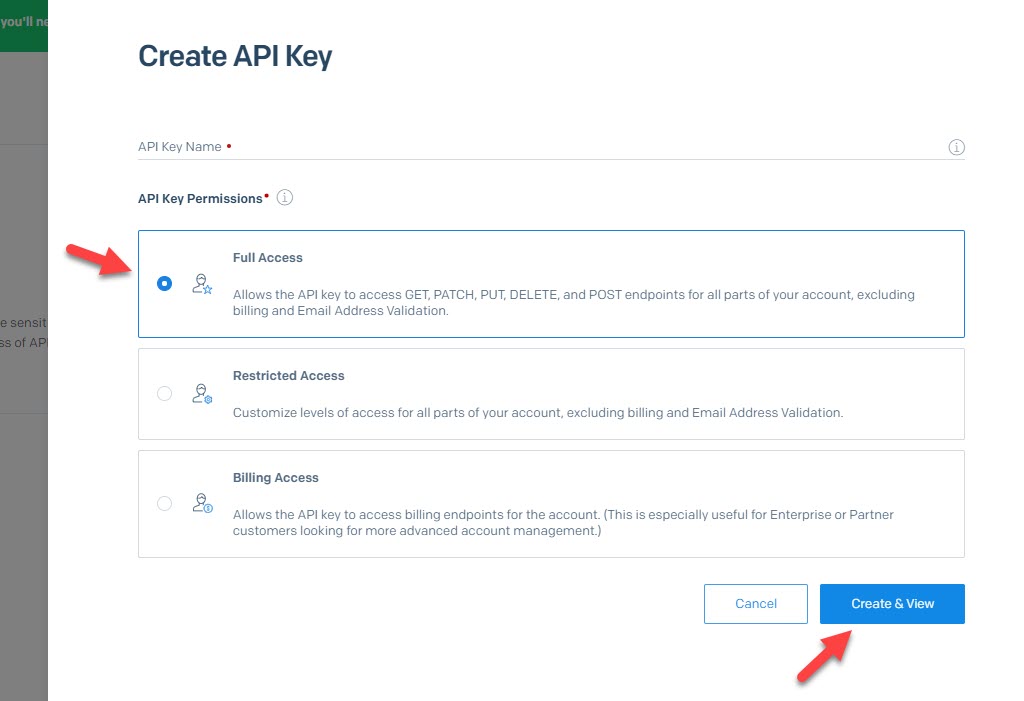
5. Click Create API Key button

6. Click Full Access & the Create & View button
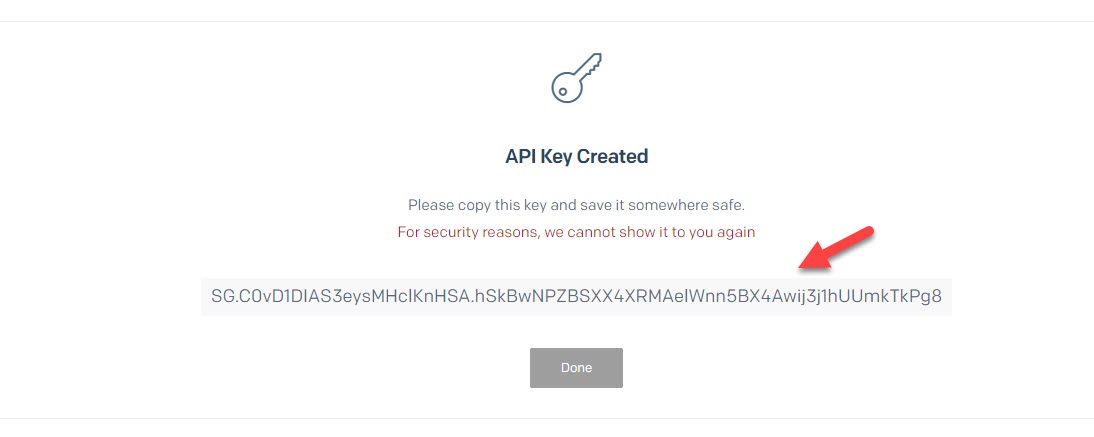
7. Click on API Key code to copy to your mouse
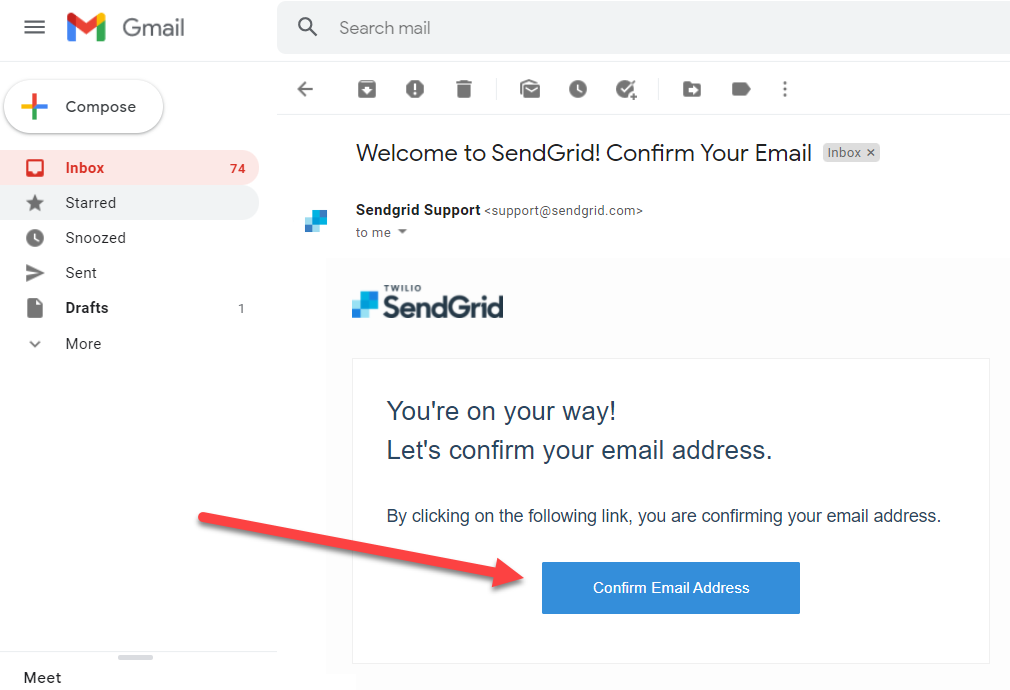
8. You will then receive an email from Sendgrid to Confirm Your Email Address.
You must do this or the Email Messaging will not work.
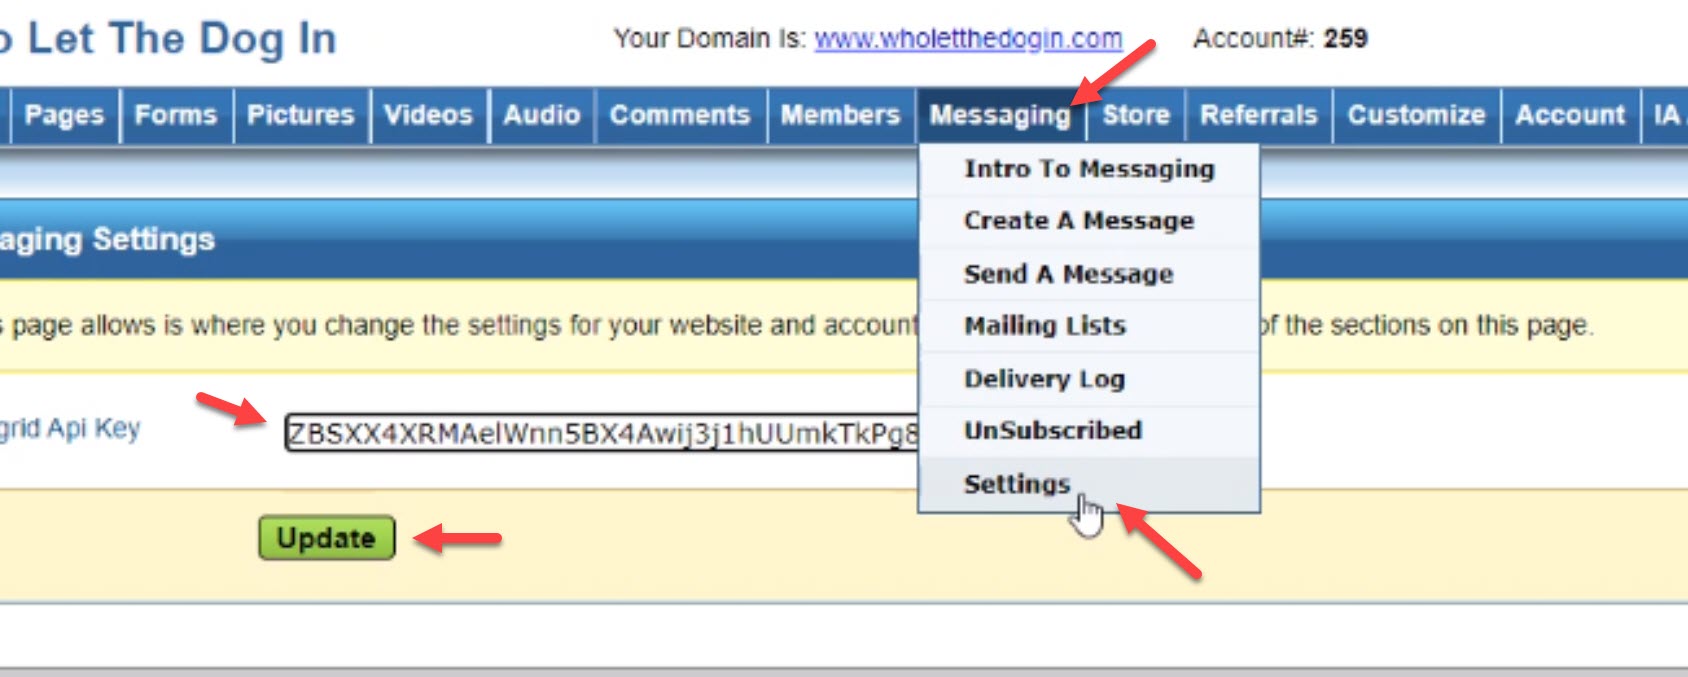
9. Login in to you IA editor, click on the top bar Messaging, from the drop down click on Settings, copy you SendGrid API Key code in to the Create, and click Update.
10. Go Back To Sendgrid & slect a PAID Product
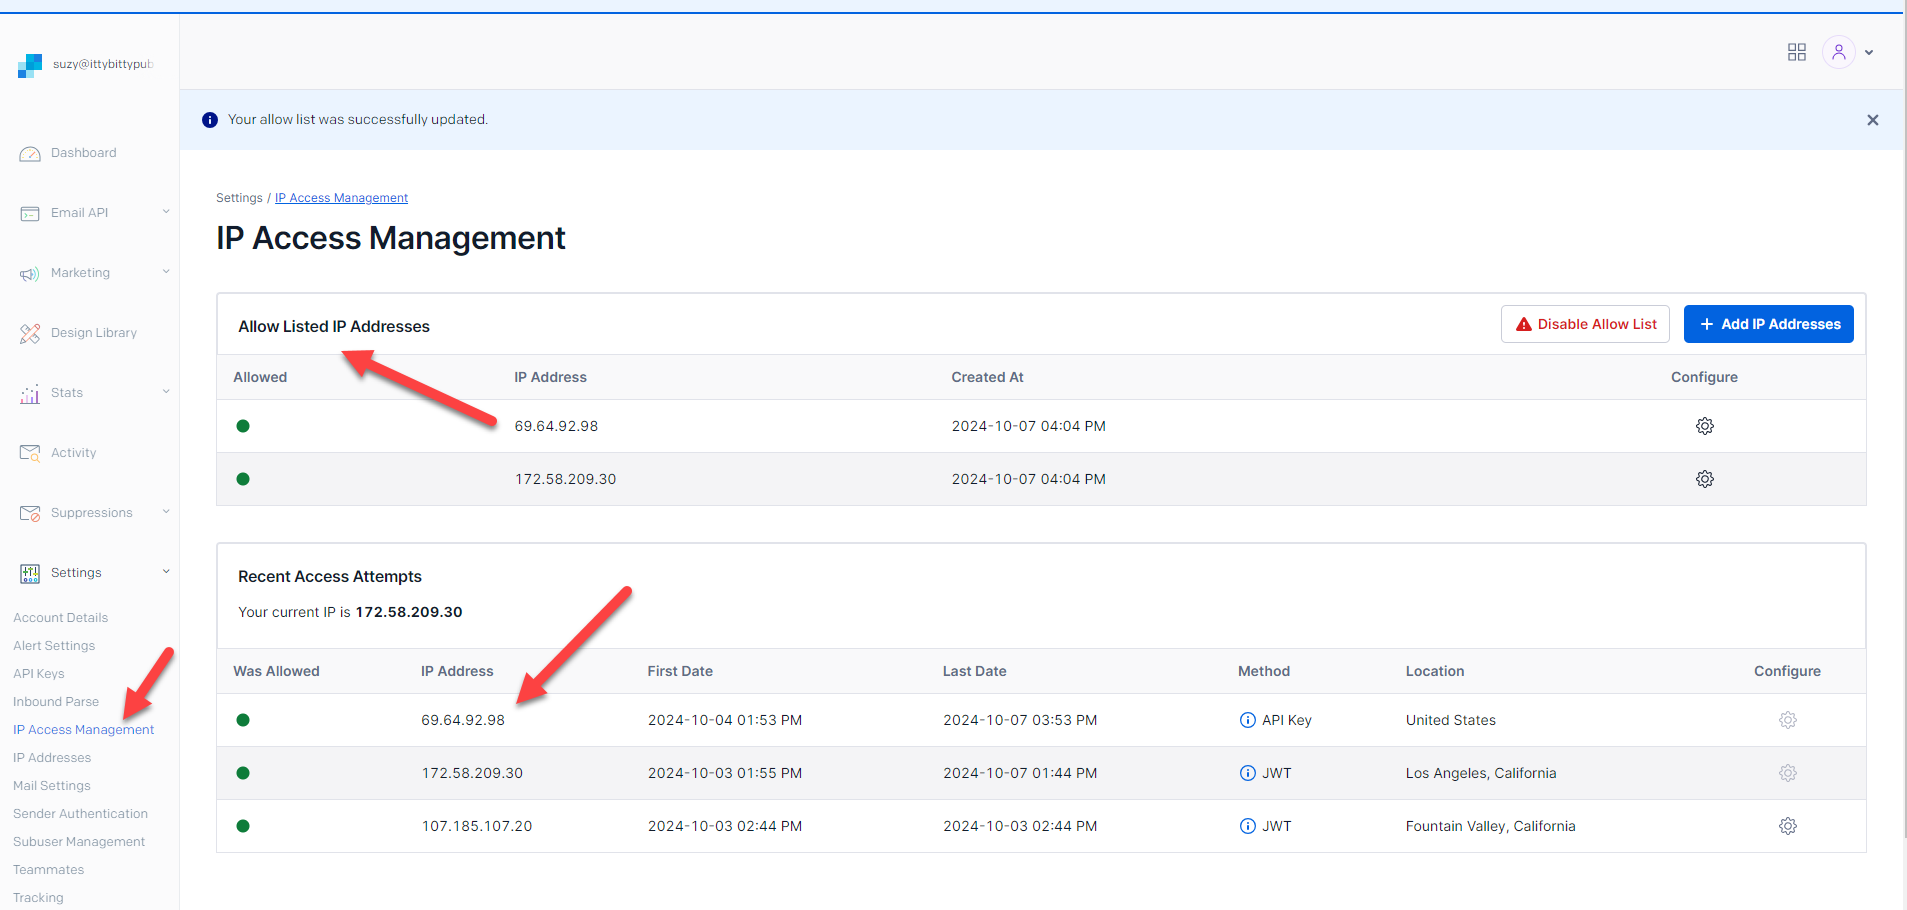
11. Add the Income Activator Server IP Address
- Select IP Address Management
- Select the IP Address 69.64.92.98 - SAVE IT
- Make sure it shows up in the box entitled 'Allow Listed IP Addresses'
10. Now you are ready to send out your emails.
Here's how to Create A Message
Here's how to Send A Message
How to use The Delivery Log
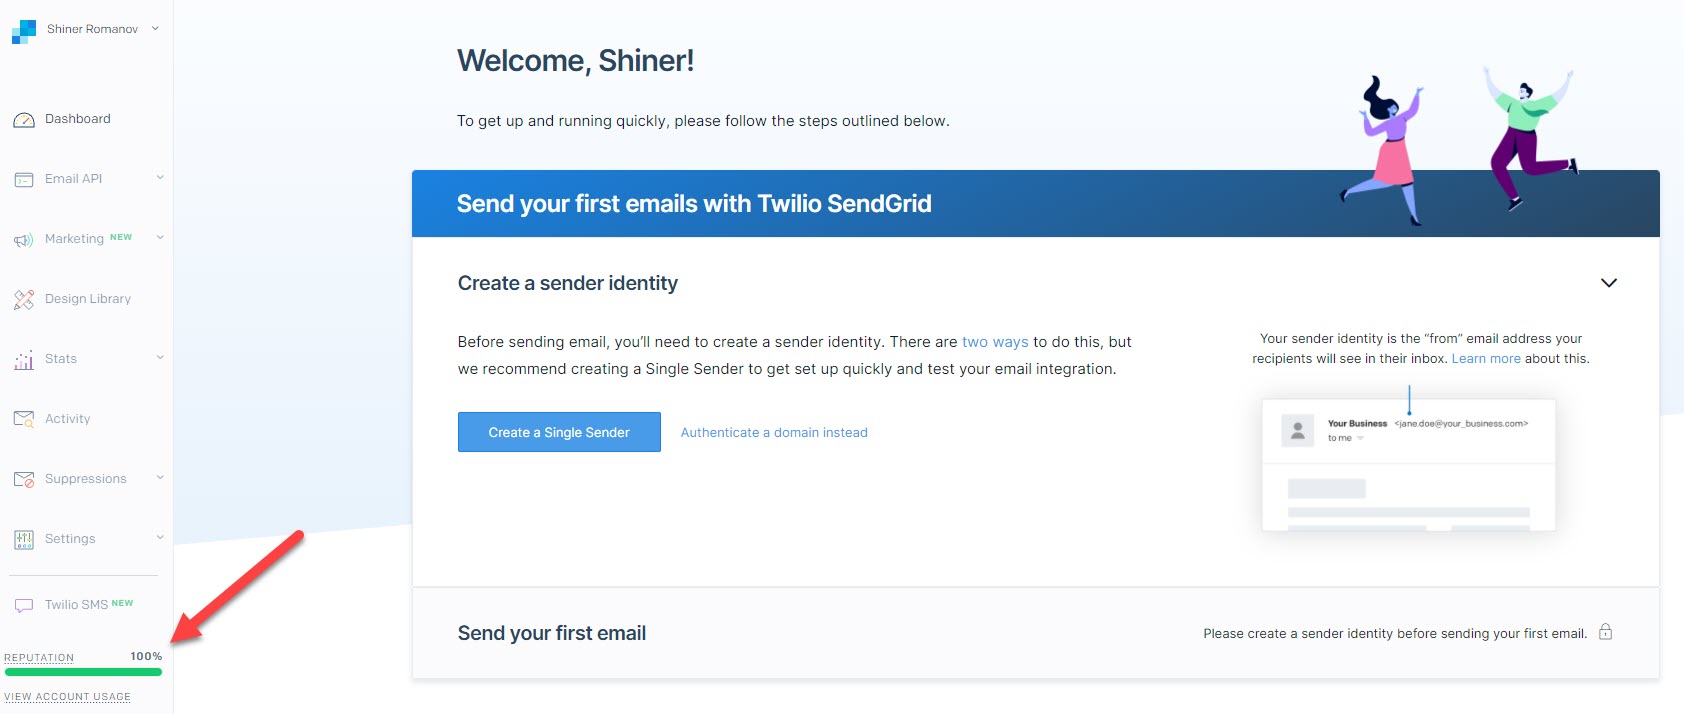
11. Email Reputation
Always keep checking with your SendGrid Account to ensure you have a good Email Reputation. If you don't, cancel your SendGrid Account, re-register and get a new API Key.
12. Confirm you are on a PAID Plan
Navigate to Account Details from Settings, then select Your Products page.
You should see Email API and Marketing Campaigns, with "Change Plan" buttons under both of them.
Select Change Plan under Email API.
Make a selection from the available plans, select one and confirm it
If there are any errors when you do so, please share a screenshot to Sendgrid?